Hello everybody, it is me again, Dan, welcome to my recipe site. Today, I will show you a way to make a distinctive dish, easy ohagi rice cakes made with pre-cut mochi and rice. It is one of my favorites. For mine, I’m gonna make it a bit unique. This is gonna smell and look delicious.
Great recipe for Easy Ohagi Rice Cakes Made with Pre-Cut Mochi and Rice. I had a craving for ohagi rice cakes, but if I make a lot, I end up with too many leftovers. So I came up with this recipe to easily make a small portion of mochi. It's easier to work if you put some water in a bowl for.
Easy Ohagi Rice Cakes Made with Pre-Cut Mochi and Rice is one of the most favored of recent trending foods in the world. It is easy, it’s quick, it tastes yummy. It is enjoyed by millions daily. Easy Ohagi Rice Cakes Made with Pre-Cut Mochi and Rice is something that I have loved my whole life. They are fine and they look wonderful.
To get started with this recipe, we must prepare a few components. You can have easy ohagi rice cakes made with pre-cut mochi and rice using 3 ingredients and 8 steps. Here is how you can achieve that.
The ingredients needed to make Easy Ohagi Rice Cakes Made with Pre-Cut Mochi and Rice:
- Make ready 1 piece Pre-cut mochi
- Take 50 grams Rice (cold rice is ok)
- Get 160 grams Tsubu-an
Choose from a wide range of similar scenes. Ohagi (Japanese Sweet Rice with Adzuki Paste). Ohagi is a traditional Japanese sweet that is still popular today. Ohagi Rice Cakes step by step.
Instructions to make Easy Ohagi Rice Cakes Made with Pre-Cut Mochi and Rice:
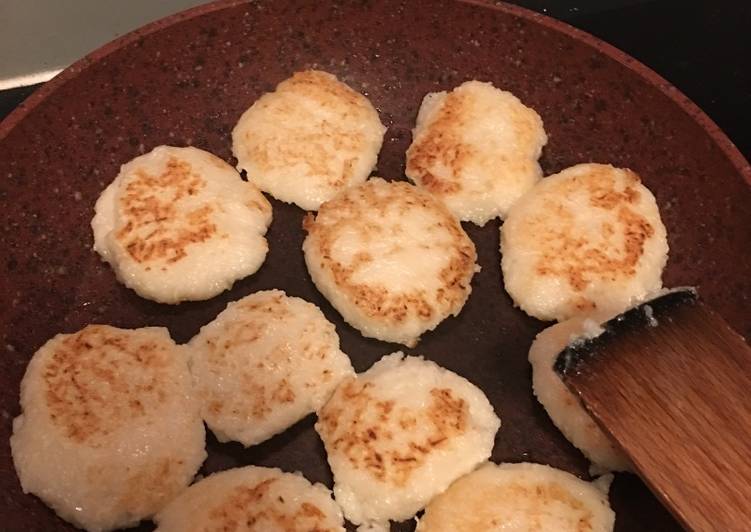
- Cut the pre-cut mochi into 6 pieces, and place in a heatproof dish. Add 1 tablespoon of water (not listed in the ingredients), and microwave for 1 minute at 600 W.
- Put the rice on top of the heated mochi, and mix with a spoon. (If you are using cold rice, microwave it with the mochi in Step 1). The mixture will stick to the spoon, so please wet the spoon before mixing.
- Divide the mochi into 5 portions (about 20 g each) and roll into balls with wet hands. Place the balls on top of plastic wrap.
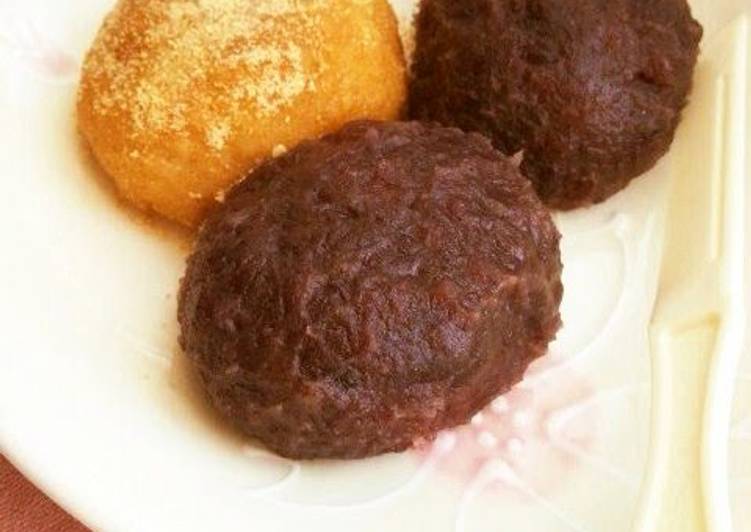
- Place 40 g of tsubu an on your palm, and flatten it. Put the mochi from Step 3 in the middle, and wrap it with the flattened tsubu an. Do the same with the remaining 4 portions.
- This is how to make kinako ohagi. Place the mochi from Step 3 (about 35 g) on your wet palm, and flatten it. Put 10 g of tsubu-an in the middle, and wrap it up.
- Mix 2 teaspoons of kinako and 1 teaspoon of sugar in a bowl. Coat the mochi balls from Step 5 with the kinako mixture.
- You can make 5 pieces of tsubu an ohagi, or 3 pieces of kinako ohagi with 1 pre-cut mochi and 50 g rice. If you want to make both kinds, you can make 4 total (2 of each)
- "Non-Deep-Fried Sesame Dumplings Made with Rice" - - https://cookpad.com/us/recipes/145996-non-fried-rice-sesame-balls
Ohagi is a traditional Japanese sweet that is still popular today. Ohagi Rice Cakes step by step. So I came up with this recipe to easily make a small portion of mochi. It's easier to work if you put some water in a bowl for wetting your hands (since the mochi sticks to your hands. This recipe calls for two kinds of rice: glutinous and Japanese.
So that is going to wrap this up for this exceptional food easy ohagi rice cakes made with pre-cut mochi and rice recipe. Thank you very much for your time. I am sure you will make this at home. There’s gonna be more interesting food in home recipes coming up. Remember to bookmark this page in your browser, and share it to your family, friends and colleague. Thanks again for reading. Go on get cooking!